Yes, it’s technically possible to use the command line to do this, but it’s modern times. I don’t think you should have to resort to coding for something like this. Starting with Windows 10 Anniversary Update and above, making your device a mobile hotspot is easier than ever.
Enable Mobile Hotspot in Windows 10
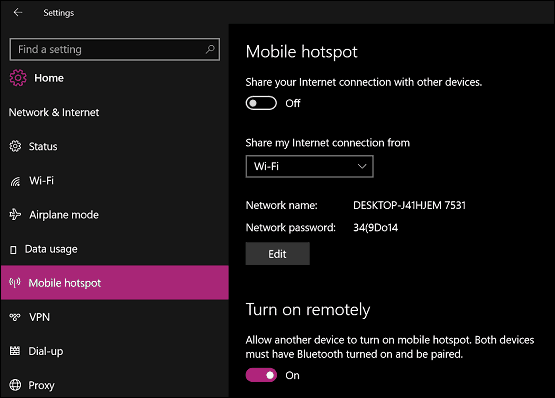
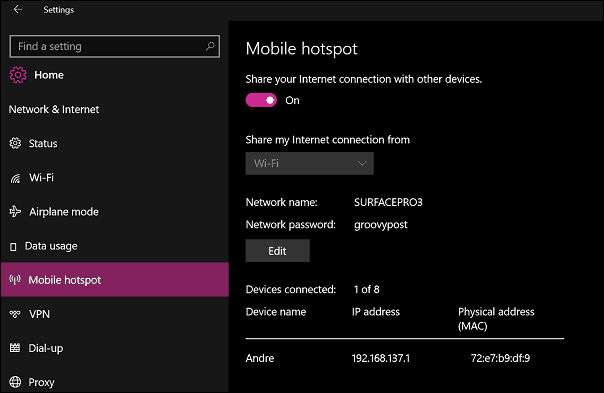
First, ensure your device is connected to the Internet. Go to Settings > Network & Internet > Mobile hotspot. Toggle on Share your Internet with other devices. Then select Wi-Fi or Ethernet from the “Share my Internet connection from” menu.
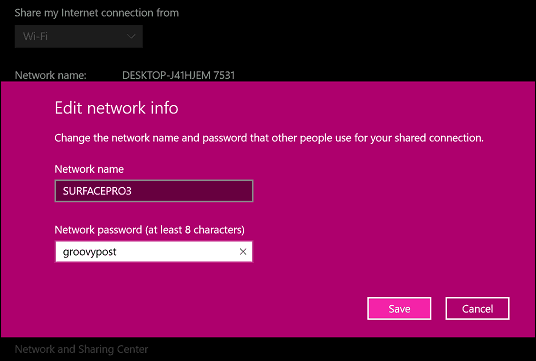
Then click the Edit button and enter a name and password for the network you’re creating.
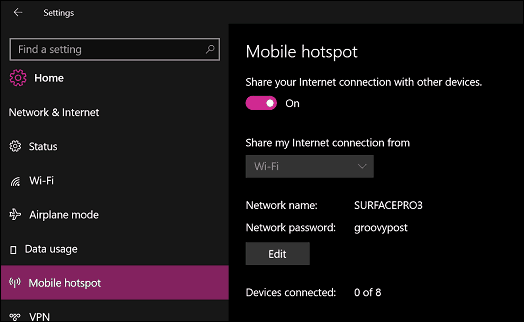
Just like its mobile sibling, the Mobile hotspot interface will display all currently connected devices.
Connecting to the hotspot is just as easy. Locate the wireless settings on your device, click or tap the network, and enter the password.
Once your device is connected, it will be displayed in the Mobile hotspot interface along with its assigned IP and MAC address.
If you happen to be sharing a mobile data connection from your Windows 10 device, I suggest you toggle off the “Turn on remotely” option. That will prevent devices like the iPhone, which remembers your wireless networks and automatically connect to them, from depleting your data in the background. Also, if you have other Windows 10 devices connecting to your hotspot, check out our article for managing limited mobile data. The Mobile hotspot features are exclusive to the Windows 10 Anniversary Update (and above), a free upgrade for devices running older versions of Windows 10. If you have no intentions of upgrading to Windows 10, check out our article about the free Virtual Router Manager. Thanks in advance. Comment Name * Email *
Δ Save my name and email and send me emails as new comments are made to this post.
![]()
