The benefit of using a powerful to-do list service is balancing your schedule. It provides a visual way to manage your time and focus on what’s important in your life. Note: ToDoist is available on iOS and Android.
Use Parent Projects for Balance
ToDoist is specially tailored for creating balance in your life. This is thanks in large part to the ability to colorize projects and create colored labels for tasks. But before you can utilize these features it’s important to structure your life. Make sure you’re using top-level parent projects that identify the four or five areas of your life that are most important to you. For example, the five things that are most important to you might be:
Saving up for retirement (wealth)Staying healthy (health)Maintaining a comfortable and stable home (home)Spending time with your family (family)Reducing stress through hobbies (hobbies)
Once you’ve identified that key areas of your life that matter the most to you, you should create parent projects in ToDoist for each of these.
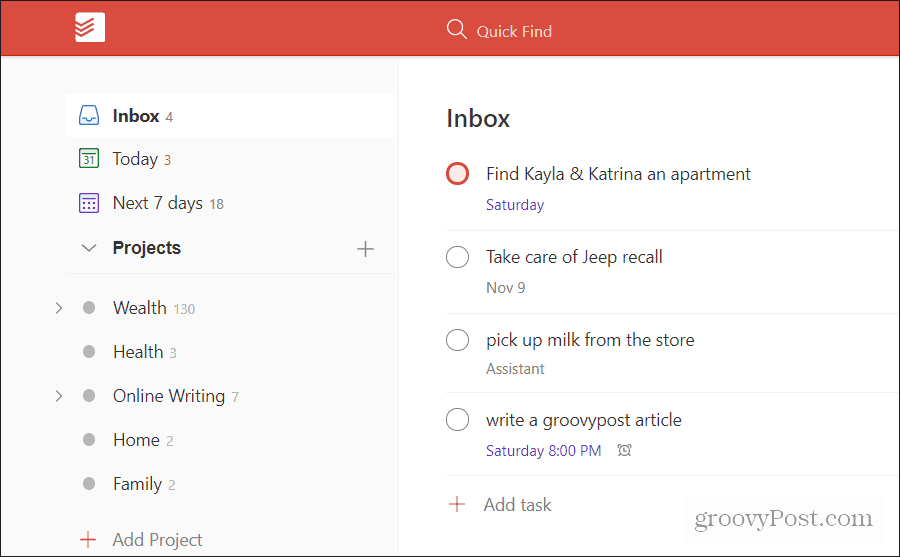
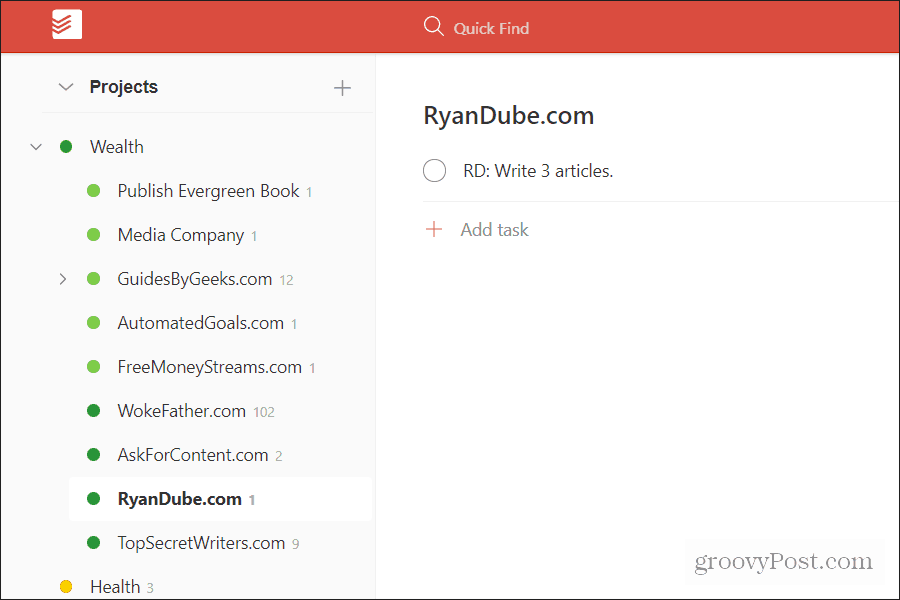
These are the areas that you’ll need to work to include tasks so that you know you’re applying an equal amount of time to each important thing in your life. If you are devoting too much attention to only one, you’ll notice this by the number next to each project. These numbers identify the number of tasks contained inside those projects.
Colorize Projects to Visualize Balance
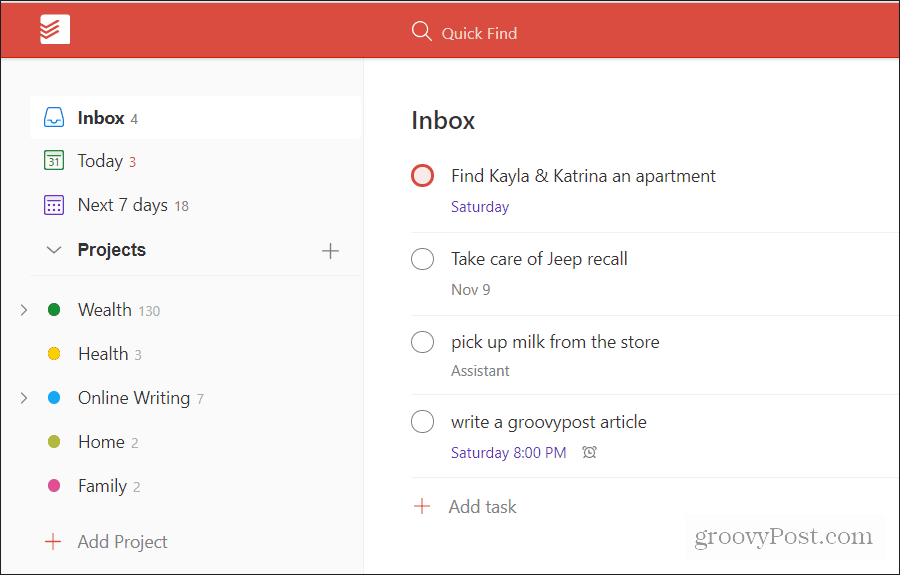
Colorizing each project provides visual indicators in your task list. It helps show how you’re balancing your time. You’ll see an example of this later in this article. To apply color to a project, just select the three dots to the right side of the article name, and select Edit project.
In the edit project pop-up window, select the color under Project color, and apply the color that you’d like to represent this project. Select the Save button when you’re done.
As a general rule of thumb, try to make the colors distinct enough from each other so that there’s no confusion between projects at a quick glance. When you’re done, you should see that each project displays its color in a color indicator to the left of the project name.
With the foundational structure of your parent projects ready to accept tasks, the next part of creating balance is using labels.
Creating Task Labels
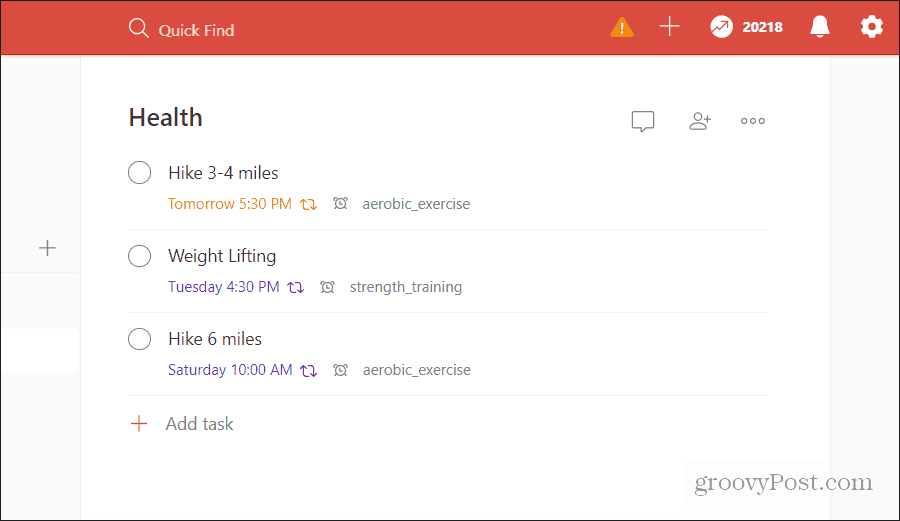
Task labels can help you further organize your sub-projects inside of those parent projects. For example, inside the Health parent project, maybe you want to organize tasks between aerobic activities and strength activities. You can do this by creating a label for “aerobic training” and “strength training”. To do this, select the three dots to the right of the task you’ve created and select Edit task.
Select the label icon and type the name of the label. Labels need to be one word. So aerobic exercise would need to be entered as “aerobic_exercise”. Then select the create option to create that label and apply it to the task.
When you’re done, you’ll see the labels show up to the right of the reminder icon next to the task name in the task list view.
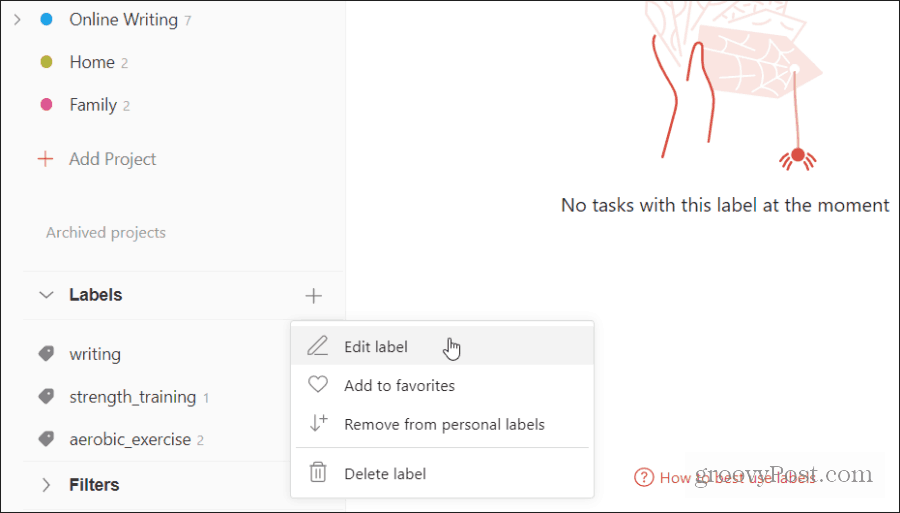
You’ll want to update the colors of labels as well for a quick visual overview. To do this, scroll down to the labels area on the left navigation pane and select the three dots to the right of the label. Select Edit label.
In the Edit label window, under Label color, select a color to assign it to that label.
Colors can have a strong psychological effect as to how you view those tasks so give them an appropriate color depending on how that color makes you feel. For example, for an intense activity like strength training, you might give it a darker red color. Then you’d probably give aerobic activity a lighter red color. You can view all of your labels in the left navigation pane toward the bottom. You can see the number of tasks assigned to those labels by the number listed to the right of the label.
The benefit is seeing how well you’re balancing out your tasks across parent projects. But also in the subtask areas you’d like to focus on. When you select a label with multiple tasks in it, you’ll see a list of all those tasks. On the right side of each task, you’ll see what parent project they’re assigned to. This is an easy way to see multiple tasks across multiple projects that may all serve a single purpose in your life. For example, one label may be “public speaking”, which are tasks that will help you improve your public speaking skills. You may have tasks in the Hobbies project or the Work project that both serve this common goal.
Organizing Colored Projects
If you have sub-projects inside of those parent projects, you’ll want to give those a color, too. Just like you did with the parent project. A good rule of thumb here is to keep all of these along with the same color scheme. This will help you see how balanced your day is when you view your overall task list. As you assign colors to projects, you don’t have to use the exact color of the parent, but you should use a common shade. One way to do this is to assign a lighter shade to less important projects, and a darker shade to more important ones.
The benefit of keeping the color scheme the same is making your overall task list balanced. You can view your overall task list. You can make sure you have a healthy mix of colors in your schedule.
Summing Up
A good mix of colors means that you’re focusing enough on all aspects of what’s important in your life. If you notice you have a majority of one or two colors, then you know you’re off balance and not applying enough of your time throughout all areas. Play around with due dates and make sure you’re creating time for everything — health, wealth, and family. Keeping that balance in your life is important. And using this color scheme for both projects and tasks can help you accomplish that.
![]()

