Or, if you purchase a new Windows 10 PC, the manufacturer will already have the PC named. And you might want to rename it to something more personal that allows you to manage your systems. Whatever the reason you need to rename your computer, there is a new way to do it via Windows 10 Settings. The old way to do it still exists, too. Here’s a look at both ways to rename your Windows 10 computer.
Rename Windows 10 PC
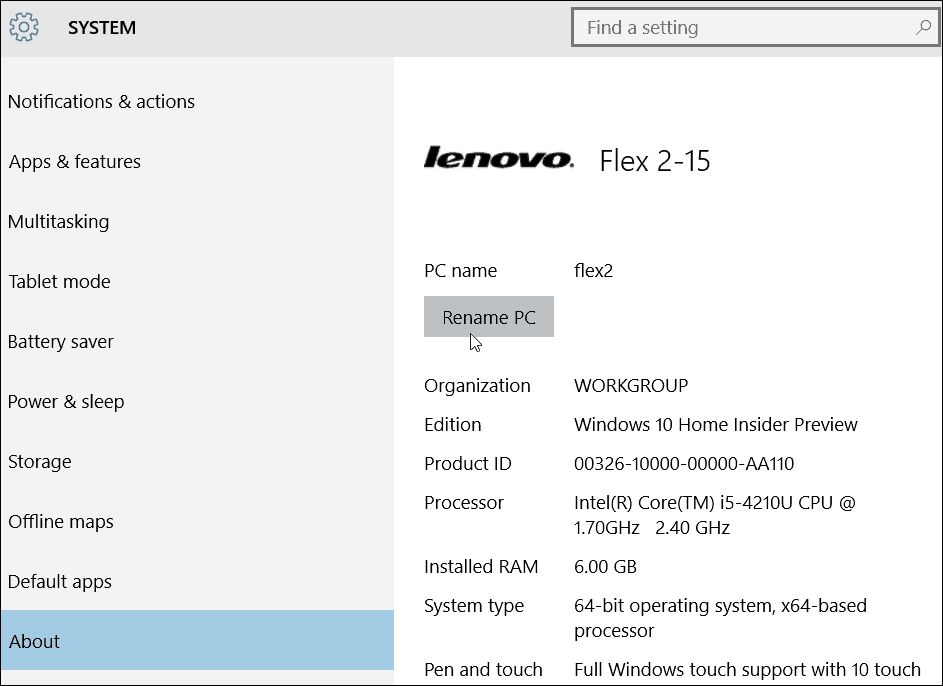
Go to Start > Settings > System > About and select the Rename PC button in the right column under PC.
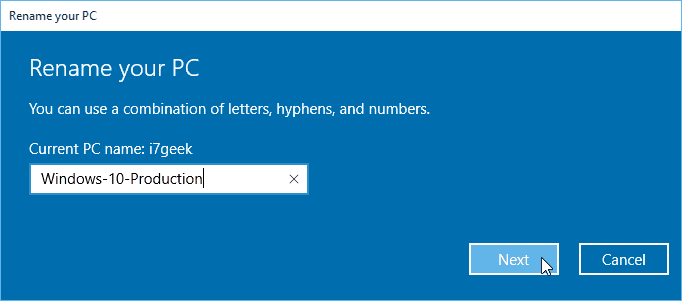
Then type the name you want to rename the computer.
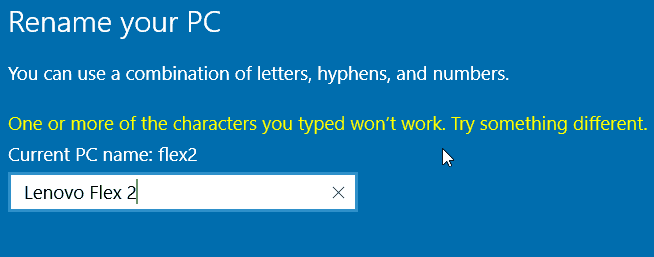
Remember that you can’t have spaces and certain other special characters, and if you try to use them, you’ll get the error message shown below.
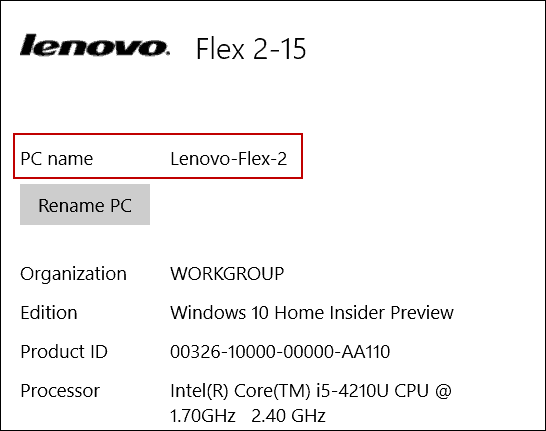
A restart is required and after coming back you’ll see the name has been changed.
Rename PC from Control Panel
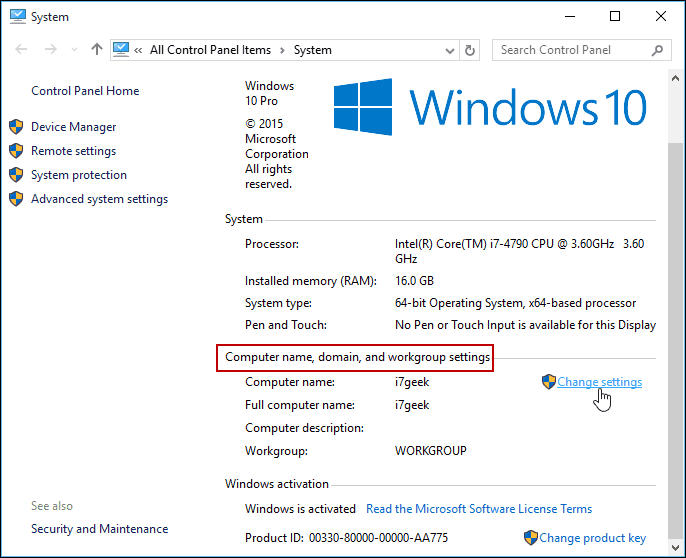
While Microsoft wants the new Settings menus to take over Control Panel, you can still use the old way that you would rename it in XP, Vista, Windows 7, and Windows 8.1. To do it, you will need to open the classic System page in Control Panel. Then click the Change settings link under the “Computer name, domain, and workgroup settings” section.
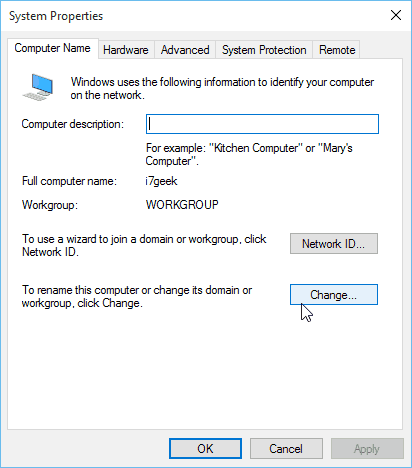
The “System Properties” screen will open with the Computer name tab already selected – click Change.
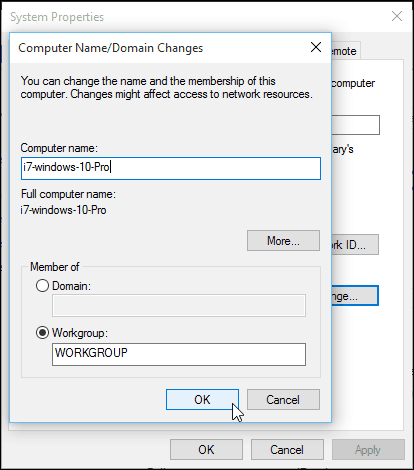
Now type the new name you want in the “Computer name” field and click OK.
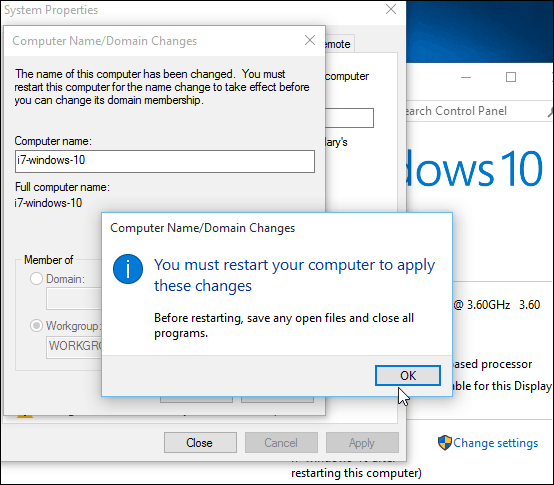
A restart will be required to complete the name change, and after that, you’re all set!
Speaking of reasons to rename your computer, if you have multiple PCs and devices, you can manage them on your Windows account page. Changing the names, and deleting old devices allows you to keep things in order.
![]()

