Why Upgrade to an SSD?
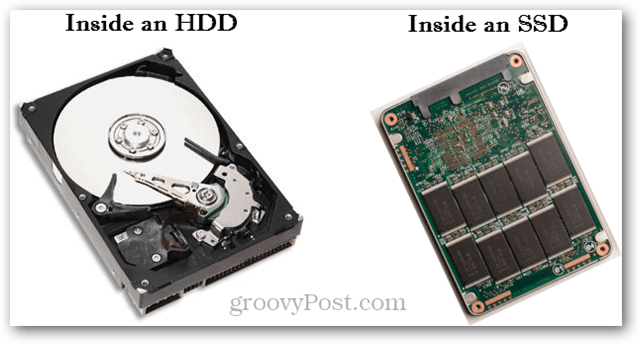
A Solid State Drive is designed a lot differently than your conventional hard disk drive (HDD). A standard HDD is essentially a box with a magnetic spinning metal dish inside. The data is stored in the exterior magnetic skin of the spinning dish, and a very small head-unit reads or writes data to it. The concept isn’t much different than a vinyl disk player. Needless to say, external movement isn’t very good for the disk. The HDD found in laptops differs from desktop units as the Laptop versions are more resistant to damage from movement, but it can still happen. When an HDD reaches the end of life, it becomes a clunking piece of metal, and the data on it is no longer readable. The inside of an SSD is a series of interconnected flash memory chips. It functions similar to removable USB thumb drives, but the two are not to be compared otherwise. The flash memory inside an SSD is faster than you would find in any external drive and is very reliable. An SSD isn’t bothered by movement, and it offers much faster performance than even the best HDD. Most importantly, when an SSD reaches the end of life, usually, the data on the drive is still readable. Instead of turning into scrap, a dead SSD enters “read-only” mode and is no longer capable of receiving new saves to its memory. The caveat is that SSDs are much more expensive, although the price has dropped significantly in the last three months. The bottom line: if you haven’t experienced the way Windows or Linux performs with an SSD, you’re missing out!
What you’ll need to get started:
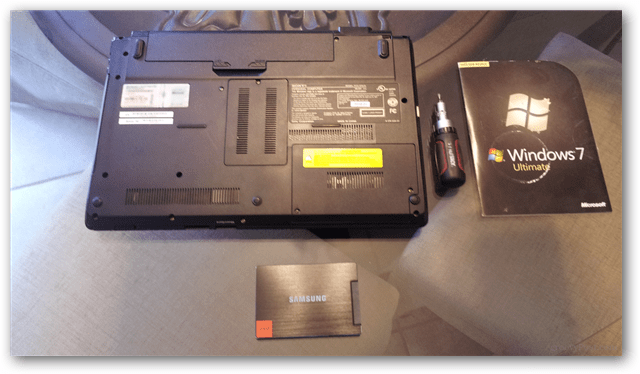
A laptop that needs upgradingAn SSD — We recommend the Samsung 840 series, which you can get in 120 GB, 250 GB, and 500 GB, models.A small screwdriver (multi-head set recommended)An operating system installs disk/USB or OS cloning software.
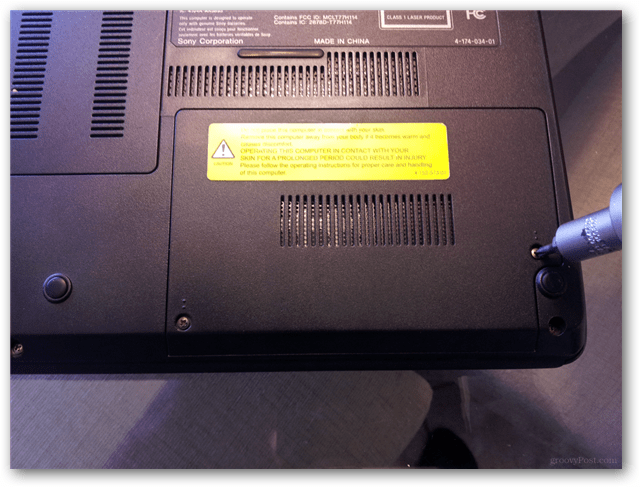
In the typical laptop case build, there are a few screws hiding an otherwise obvious hard drive slot. The giveaway to its location is the shape and size of the panel hiding the drive. In the case of the laptop in the picture, it just takes the removal of two screws to take off the panel.
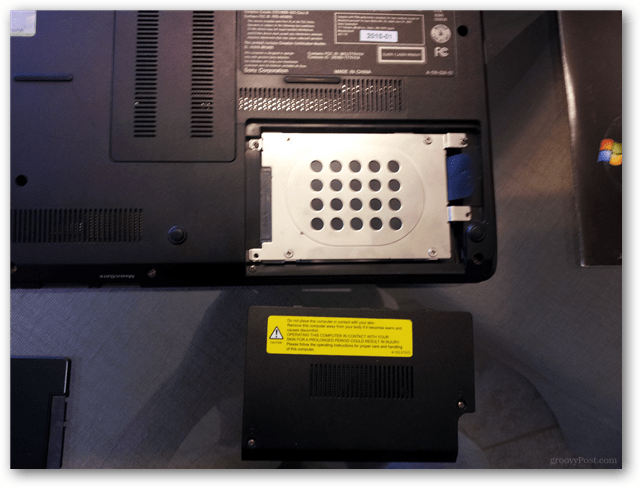
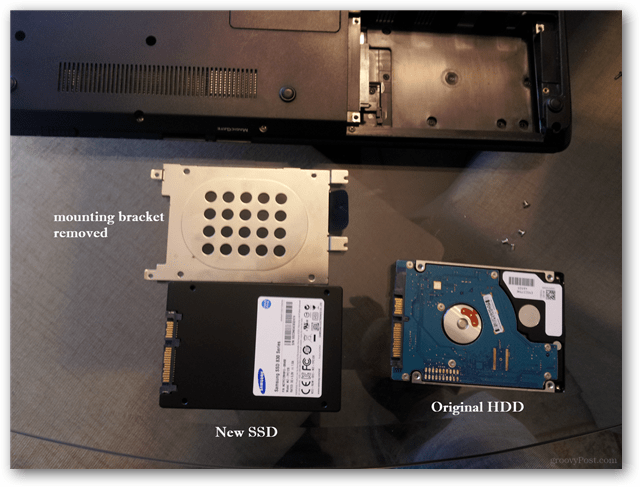
Underneath is the stock HDD. It may look a little different, but that is pretty common as many laptop manufacturers include a special mounting bracket to keep it from sliding around. In this model, only two more screws are holding it in.
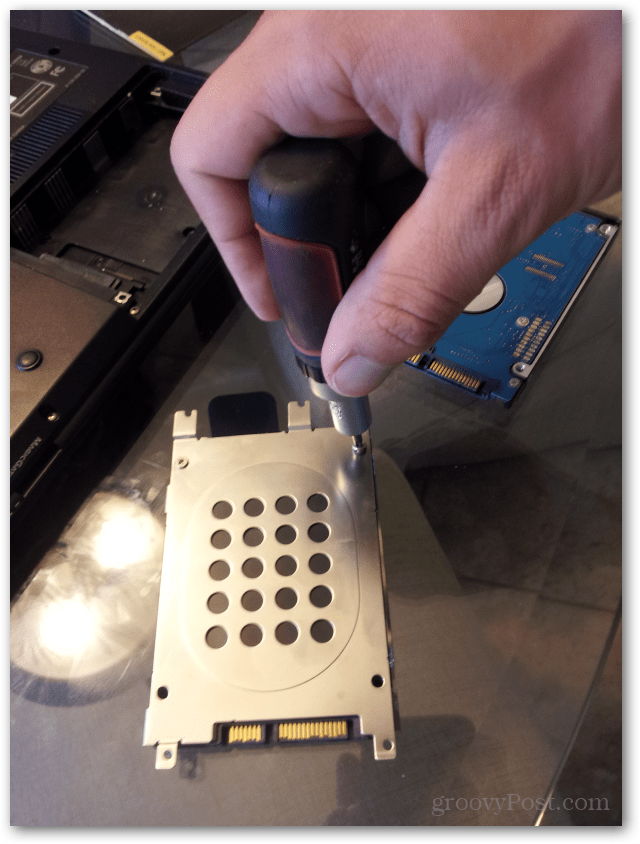
Now the stock HDD is out, and all we need to do is swap the mounting bracket to the new SSD, but first, we have to remove it. In this model, there are four screws holding the mounting bracket to the HDD.
A good screwdriver makes the job quick and easy. Now screw the mounting bracket onto the new SSD.
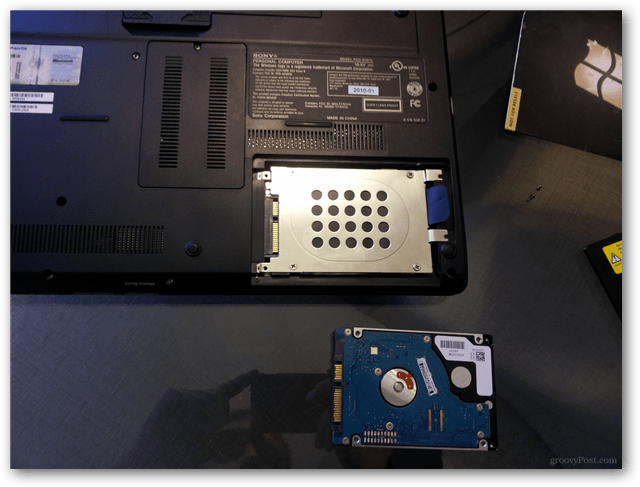
Now with the new SSD in place, all that’s left is to put the last panel back on and set up the operating system. In this case, I’m just going to use the Windows 7 Ultimate installation disc in the Laptop’s optical drive to result in a fresh and clean Windows 7 system. Overall it was quick and painless. There are also a few methods for transferring an existing system from the HDD to the SSD, but we’ll save that for another guide, so stay tuned here on groovyPost!
If you have the cash, this is probably the best upgrade a person can make to a computer PERIOD. So many get caught up on fast CPU’s and Memory upgrades when the real problem is a slow disk or disk I/O problems. A fast disk = a fast computer. :) Comment Name * Email *
Δ Save my name and email and send me emails as new comments are made to this post.

![]()
