Whatever the case, Netflix allows you to hide titles from its enormous library of content. Here’s how it works.
How to Hide Titles on Netflix
To get started, launch a browser on your PC or Mac and log into Netflix. Then hover over the profile icon and select Account.
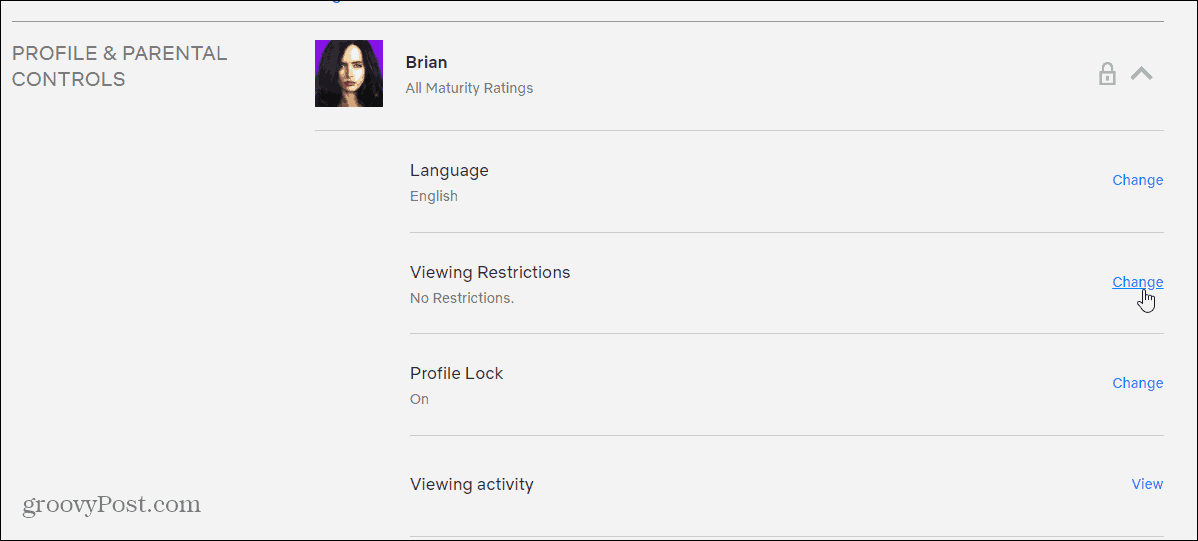
Now, scroll down to the bottom to the “Profile & Parental Controls” section. From there, choose the profile that you want to hide a title from. Then expand the menu for that profile and select the Change link next to “Viewing Restrictions” from the menu.
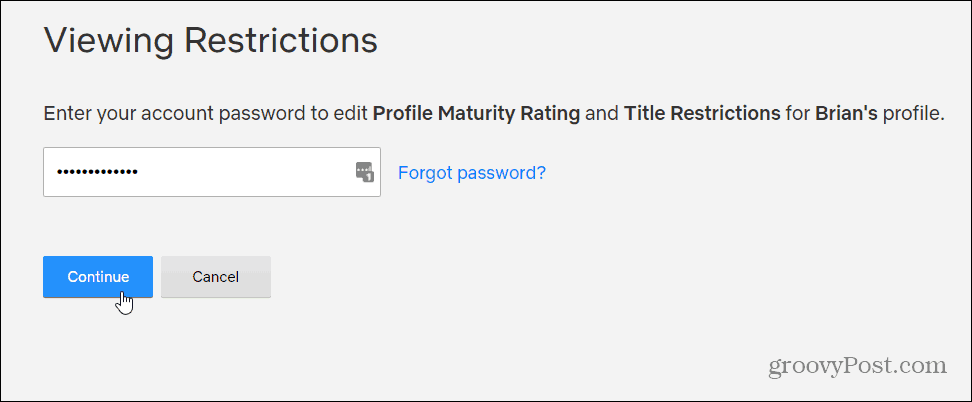
Next, type in your account password again to verify it’s your profile and click the Continue button.
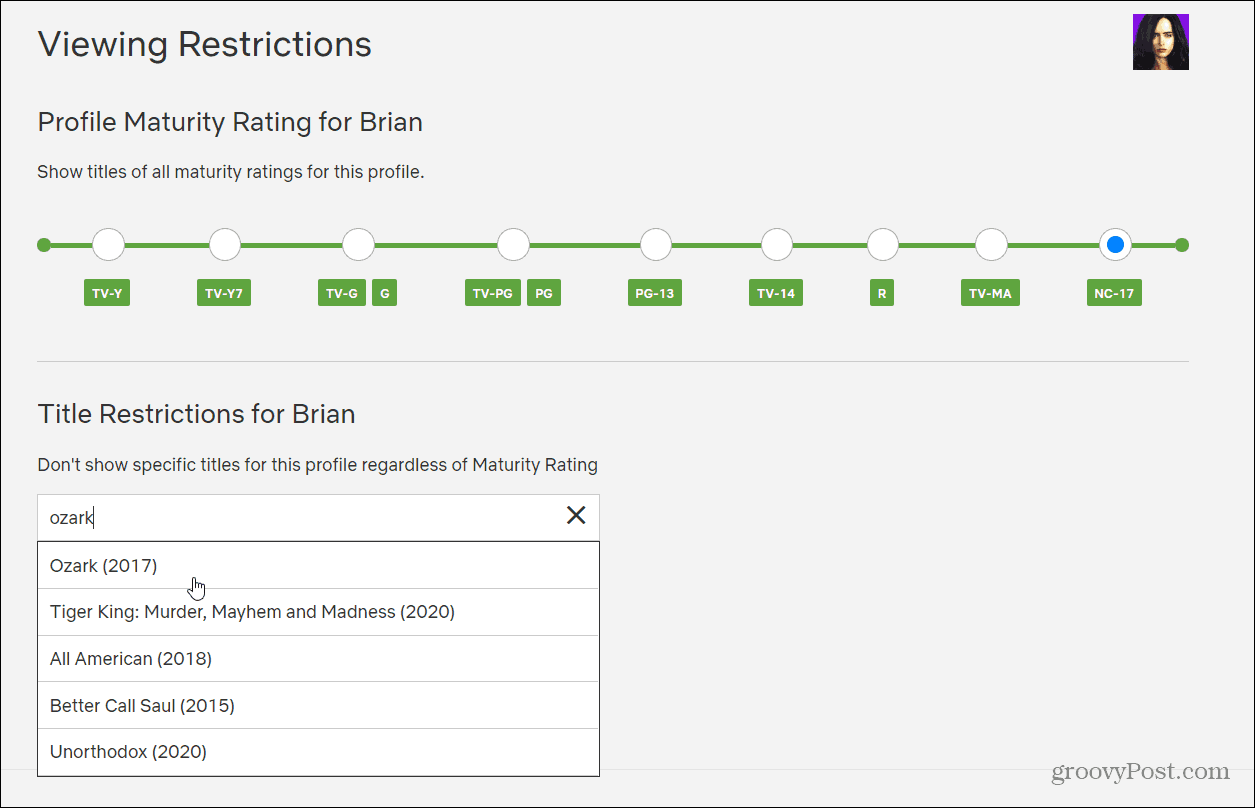
Now, enter the show or movie that you want to hide in the box under Restrictions For section. As you type, it will give you the name of the show or movie on a menu.
That’s it. Now moving forward you won’t see those titles showing up when choosing what to watch on Netflix. Make sure to click the Save button for the changes to go into effect. If you want to remove a show just click the X next to the title of the content
A few things to keep in mind here. First, this feature is profile-specific. So, if you want to hide titles from other users you need to go into each profile and hide it. For example, perhaps there is a title in your kids’ profile that you don’t want them to see. Then you need to go into that account directly and make the change. Also in this section is the ability to change the Profile Maturity option. This lets you set the maximum age rating for the profile. It will then only display age-appropriate content.
![]()


