We’ll show you a few different ways to locate emails by date in Microsoft Outlook and then delete them. If you prefer to archive any older emails you find instead of getting rid of them for good, you can do that, too.
Find and Delete Emails by Date Using Search
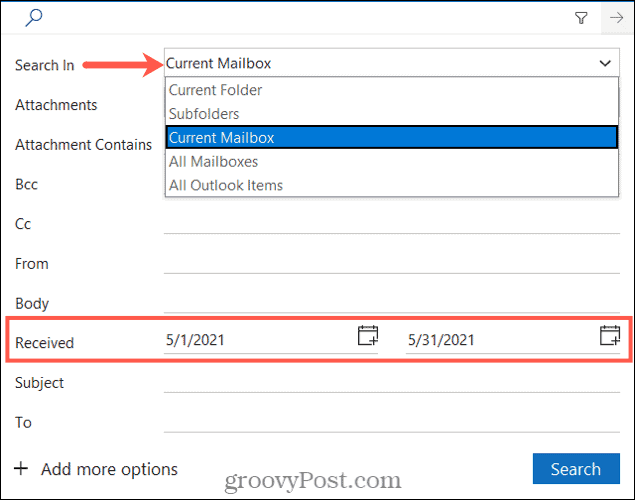
Unless you use it regularly, you might not even notice the Search box at the top of your Outlook window. This handy tool doesn’t just search for the keywords that you enter. It also works to filter through your emails, allowing you to locate exactly what you need. To find emails using the Search tool in Outlook:
Analyzing Filtered Search Results in Outlook
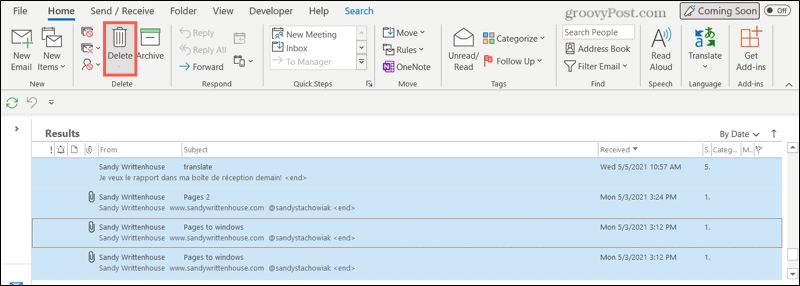
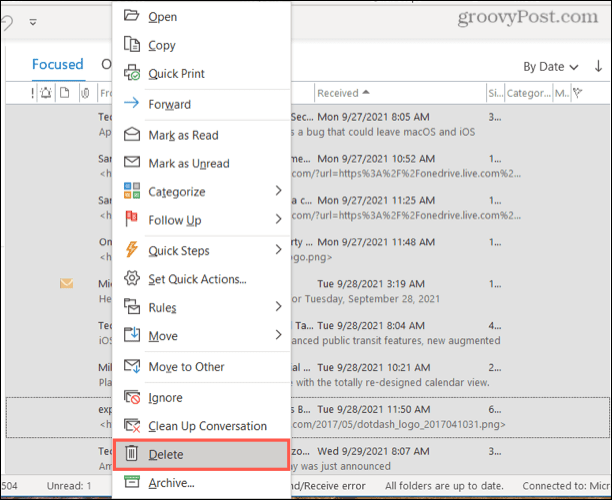
Once you’ve used the search tool to filter through emails by the date you received them, you should see the results with a total count listed in the bottom left. If you want to delete all of the results found for that time period, you can select the emails easily by pressing Ctrl + A. Then, either right-click and pick Delete or click the Delete button on the Home tab. If you’d prefer to hide (but not delete) the emails, click Archive instead of Delete in the shortcut menu or on the Home tab.
To clear the filter and return to a normal view of your inbox, click the X icon positioned on the right side of the Search box that displays the filter data.
Find and Delete Emails by Date Using Sort
Another way to locate emails by date is using the sort feature in Outlook. You can use this feature in Outlook to delete emails by date by first arranging them in an easy-to-view list. To do this, click the Received column header in your inbox, or use the sort box in the top-right of your inbox to choose By Date. You’ll then see your emails sorted with the newest emails listed first.
If you want to see the oldest first, click the Received column header again so that the arrow is pointing up instead of down.
You’ll also see your emails grouped by Today, Yesterday, Last Week, Last Month, and so on. To select a range of messages to delete, click the first email, hold Shift, and click the last email in the range you want to select. From there, either right-click and pick Delete or click Delete on the Home tab.
Again, if you prefer, you can choose Archive instead of Delete in the shortcut menu or on the Home tab. This will hide the emails but won’t delete them entirely.
Find and Delete Only Old Items
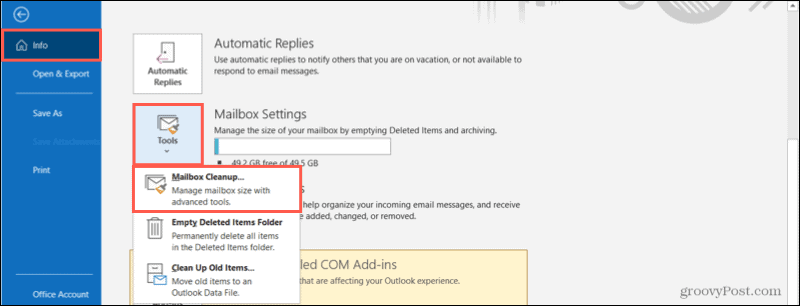
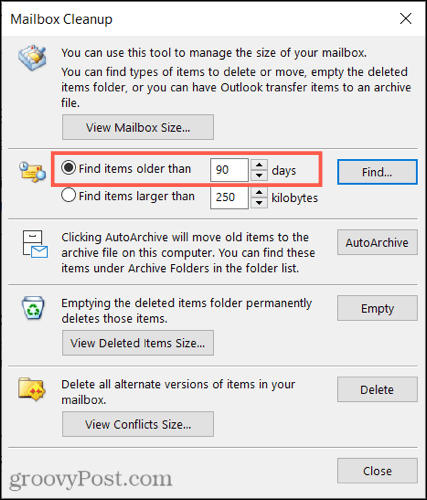
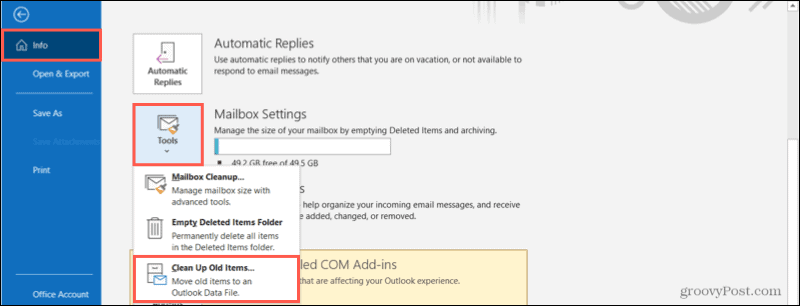
If you want to rid your inbox of old emails, you can use the Mailbox Cleanup tool in Outlook to get the job done quickly. To do this, click File in the Outlook menu, then press Info. On the right side, click Tools > Mailbox Cleanup.
In the second section of the Mailbox Cleanup menu, mark Find items older than and enter the number of days. Click Find to search your inbox.
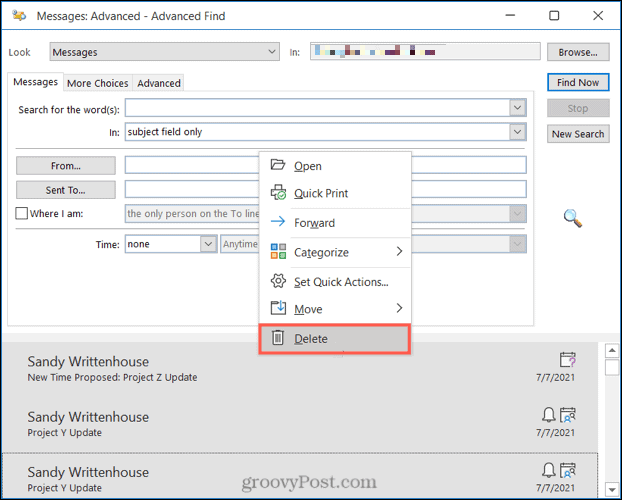
You’ll then receive the results for all matching items in that mailbox, not just emails. You can delete the items one at a time or select them as described above. Right-click and pick Delete to remove them.
Alternatively, you can right-click, select Move, and send them to your archive instead.
Find and Archive Old Items Only
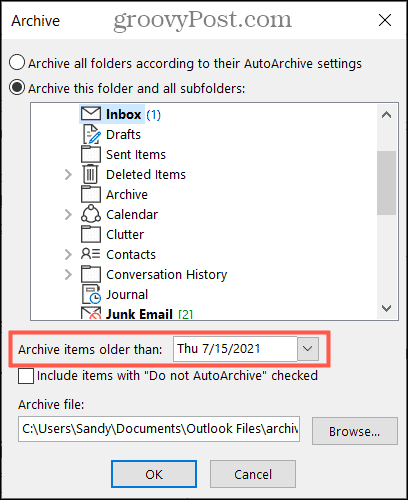
If you like the idea of Outlook taking care of old items, but you’d rather archive than delete them, Outlook offers a cleaning tool that will do it for you. To start, press File in the menu, then press Info. On the right, click Tools > Clean Up Old Items.
You can then select a specific mailbox (if you have more than one), choose the various folders to search within, and pick a date using the drop-down box labeled Archive items older than. Click OK to tuck away those emails into your hidden archive.
Flexible Finding and Deleting by Date in Outlook
As we’ve shown here, using Outlook to delete emails by date is easy. Whatever your preference, Outlook gives you the tools and flexibility to get the job done. You can use the steps above to find emails from a particular date or period (such as a month) and then delete or archive them. If you’re having trouble searching through your emails, you may want to rebuild your Outlook search index to try and fix the problem. Comment Name * Email *
Δ Save my name and email and send me emails as new comments are made to this post.
![]()


