Running Linux: Dual-boot vs. Virtualization vs. Live USB
The two methods outlined by Dex definitely have their strengths. But there are also some drawbacks. Dual-booting is the easiest method, after the initial setup, since it doesn’t require any bootable media. But due to some of the complexities of how Wubi integrates into your system disk, there are still some risks to your Windows installation in the event of a crash. The virtualization route is much safer—I’d even venture to say it’s 100% safe—but you’ll need a fairly mighty computer to run it at anything close to full speed (forget about virtualizing on your netbook or aging Windows XP PC). So, with all that being said, here’s a third method for installing Linux: booting from a Live USB. This method has the benefit of being completely separate from your system disk, and is therefore 100% safe, like virtualization. But since you won’t be running a machine within a machine, you won’t have as much performance lag. In fact, you shouldn’t have any. The downside: you’ll need to use a USB stick or SD card at all times and you’ll need to make some changes to your BIOS setup. Now, before you run for the hills after seeing the word “BIOS,” know that the tweaks are very minor and totally reversible. Oh, also, with this version of Ubuntu, all of your hardware should work out of the box—your mouse, your wireless Internet, perhaps even your printer. And there will be absolutely no Terminal commands required. I promise. Alright, you okay? Let’s press on.
What You’ll Need
To begin, you’ll need the following:
A USB flash drive or SD card with at least 2GB capacity.A PC with a BIOS that supports booting from USB. (Note: This does not include Macs. Sorry.)Your favorite distribution of Linux. For these tutorials, we’ve been using Ubuntu.The Universal USB Installer from PenDriveLinux.com.Windows XP/Windows Vista/Windows 7
This is sort of a long tutorial, but there are only a few actionable items. Most of this is done on auto-pilot, and some of the elements of this you may already know how to do. For your convenience, here’s an outline of what we’ll cover:
Preparing Your Boot MediaInstalling with Universal USB Installer Setting Up Your BIOS to Boot Linux from a Live USB Setting Up Ubuntu with Persistence (optional)
Preparing Your Boot Media
The Universal USB Installer is pretty foolproof. The only fussy thing about it is that it’s not always able to format your media for you. When I first tried installing Linux with the Universal USB Installer, I kept getting the error message: To fix this, I just formatted it myself using Windows. Here’s how:
Step 1
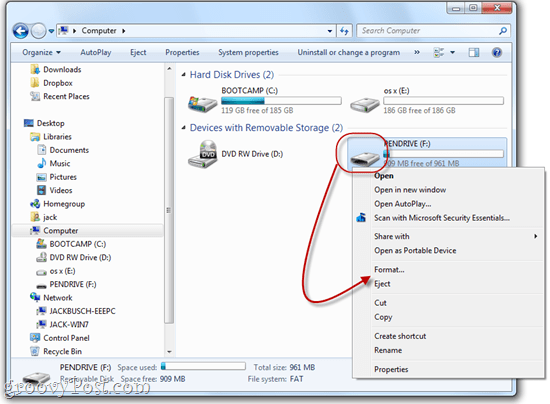
Connect your USB drive or flash card and launch Windows Explorer.
Step 2
Right-click your drive’s icon and choose Format…
Step 3
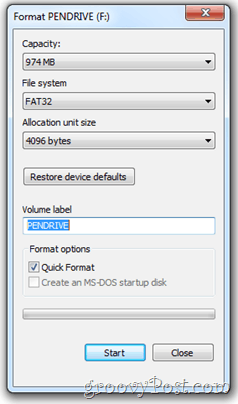
Under file system, choose FAT32. Check Quick Format and then Click Start.
Windows will warn you that it’ll erase all the contents on the drive. Make sure that you have the right drive selected and confirm. You’re done!
Installing with Universal USB Installer
Now, it’s time to turn your USB drive or flash card into a bootable drive with Linux installed. This is pretty simple.
Step 1
Download the Universal USB Installer via PenDriveLinux.com.
Step 2
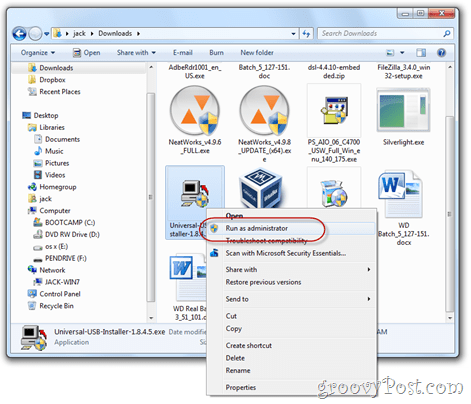
Navigate to your download folder and run Universal-USB-Installer-1.8.4.5.exe.
(For good measure, you might want to run it as an Administrator, though this shouldn’t be necessary.)
Step 3
Read the License Agreement and Click I Agree.
Step 4
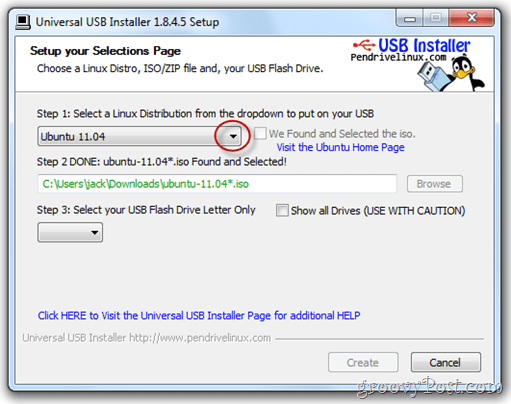
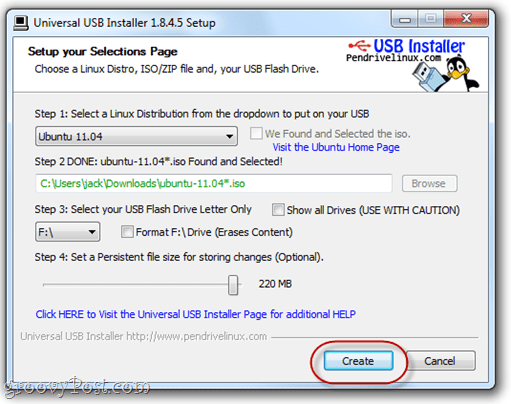
From the first drop-down menu, choose the exact distribution of Linux that you downloaded. If you got the latest version of Ubuntu, it should be Ubuntu 11.04. Next, Browse for the .iso file that you downloaded.
TIP: If you download the .iso to the same folder as the Universal USB Installer, it will automatically detect its location.
Step 5
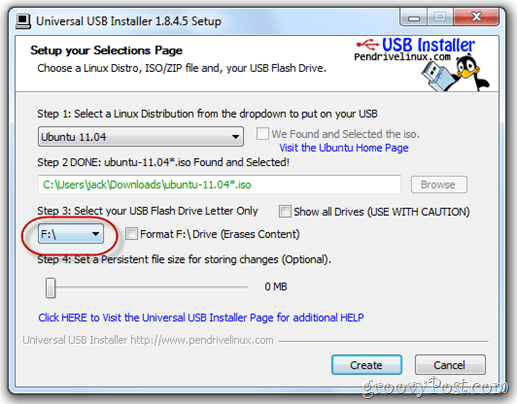
From the next drop-down menu, choose the drive letter of the USB drive or flash card that you formatted above.
Step 6
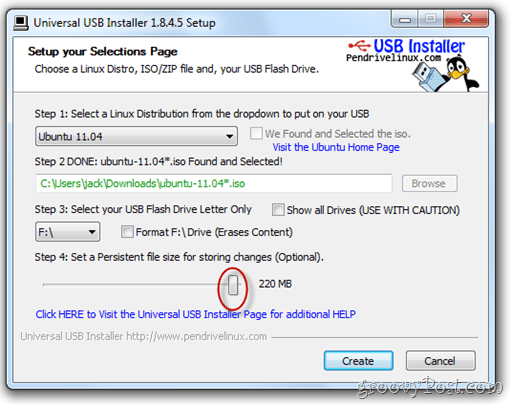
Lastly, there’s a slider bar at the bottom that lets you designate some space for persistent storage. If your USB drive is big enough, I highly recommend this. Normally, a Live USB like the one we are creating would be static. That is, any programs you installed, documents you created or settings you tweaked would be undone each time you rebooted. But by setting a persistent file size on our USB drive, we are setting aside space to save these changes.
Step 7
Click Create.
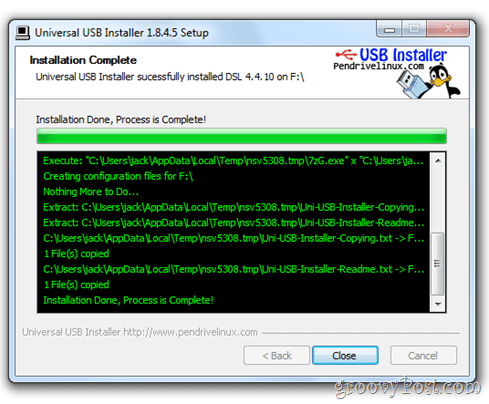
Sit back and relax and wait for the Universal USB Installer to do its thing. Note: If you chose a Persistent file size, then there will be a point in the installation when it appears to hang. Don’t fret—this is normal. It could take 10+ minutes, so just be patient.
The installer will let you know when the installation is complete. Once it is, you are free to Click Close. Note: In this screenshot, I am installing a different distro of Linux—DSL 4.4.—but the successful installation screen will look the same regardless of which distro you are setting up. Now, your Live USB is ready-to-go.
Setting Up Your BIOS to Boot Linux from a Live USB
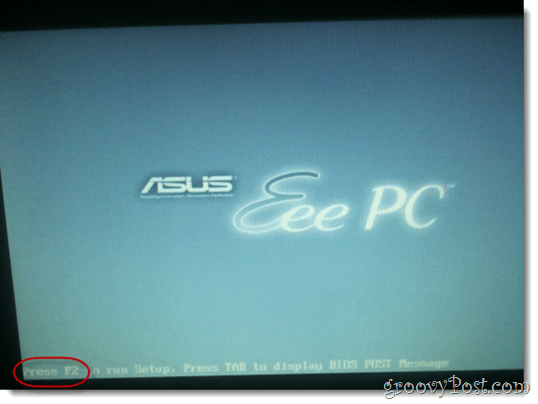
Booting from a USB drive varies from computer-to-computer, as does the procedure for changing the boot device order. I’ll show you how to do it on my computer—an ASUS EEEPC 1005HAB—but it’s probably best to Google the specific step-by-step instructions for your specific make and model. Just in case you decide not to do that (for whatever reason), let me explain our goal. By default, your computer probably tries to boot from the main internal hard disk drive (where Windows is installed). If it doesn’t find an operating system there, it’ll then try another drive—perhaps the CD-ROM or USB. What we want to do is to get your computer to check the USB drive for an operating system before it goes to your Windows system disk. To do that we need to enter into the BIOS setup page. This is accomplished by pressing a certain key during boot up but before the Windows logo appears. Usually, your computer will display it’s manufacturer’s logo before the Windows logo. The key to enter the BIOS setup will usually be indicated along the bottom. For me, it’s F2. For you, it may be F10, F12 or Esc or something completely different. Again, Google is your friend here. If you were using my ASUS EEEPC, you’d do the following:
Step 1
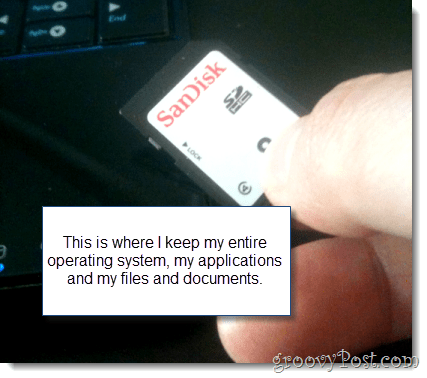
Insert your Linux Live USB or flash card. In my case, I’m inserting an SD card into my laptop’s card reader.
Step 2
Reboot your computer.
Step 3
Begin pressing the key to enter setup as soon as the computer begins booting up. Press it repeatedly if you have to. For me, I’m pressing F2 as soon as I see the ASUS logo.
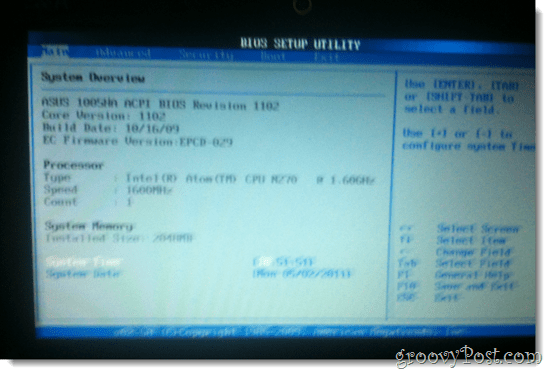
If all goes well, you’ll find yourself in the BIOS setup utility. Your BIOS setup screen may look different from mine, but no matter what computer you have, it’ll be ugly.
Step 4
Look for an option that’s something along the lines of “Boot” or “Startup Disks” or “Boot Devices.” If you don’t see anything like that, look for a menu that has an option that’s similar to “Boot Device Priority.”
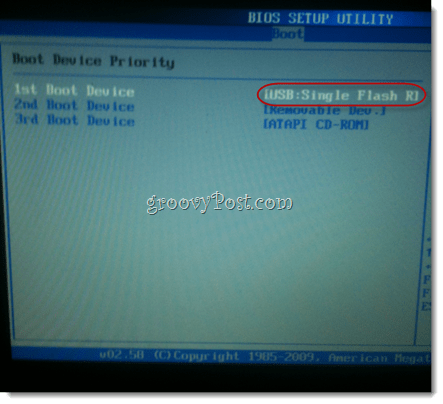
Step 5
In the Boot Device Priority settings, make the device that your Live USB or flash card is connected to the first priority.
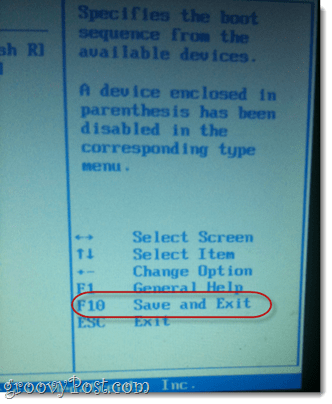
Step 6
Save Your Changes and Exit. There’s usually a hotkey for this. For me, it’s F10.
Step 7 All done. You’ll only have to do these steps once. After this, your computer will automatically boot from your USB device whenever it’s plugged in. When it’s not, then Windows will load.
Setting Up Ubuntu with Persistence
When you boot into your LiveUSB Linux device, you’ll be greeted with a setup screen with a few options. For this tutorial, I’m assuming that you don’t want to install Ubuntu on your main hard disk. So, we’ll be booting a live version of Ubuntu. Usually, this is just a “test drive” version of Ubuntu that lets you tour the OS and make sure everything works. But because we chose to create a persistent version of Ubuntu, we can actually make changes to the OS, install new programs and save documents, just like we had it installed permanently. For most Linux systems installed using the above instructions, the persistence will work out of the box. But if you reboot your Linux device and the changes still aren’t saved, then you may need to create another user. Here’s how:
Step 1
Insert your LiveUSB and boot your computer.
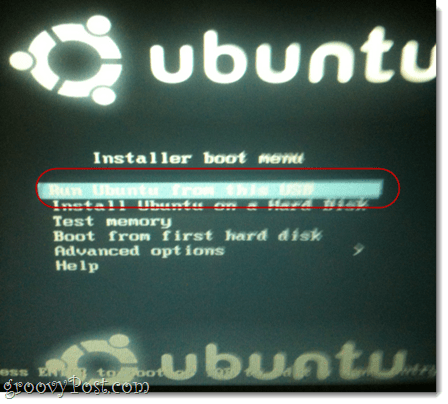
Step 2
When the Ubuntu Installer Boot Menu appears, choose the first option: Run Ubuntu from this USB.
Step 3
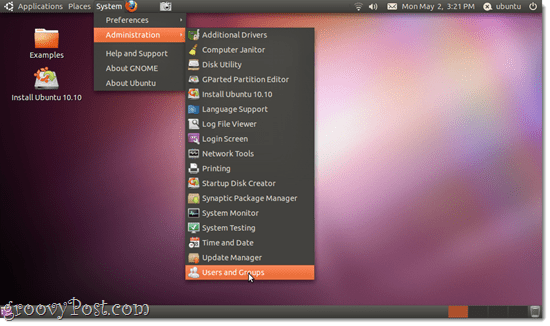
Ubuntu will boot into a Live session. From here, you should be able to use Ubuntu like normal. However, any files you create or change won’t be saved for the next time you boot. You’ll need to create a new user in Ubuntu in order for your changes to be saved. To do this, Click System > Administration > Users and Groups.
Step 4
Click Add.
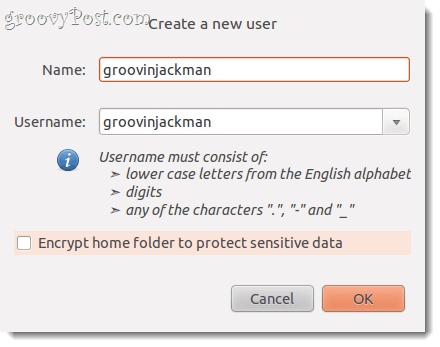
Step 5
Give yourself a username and Click OK.
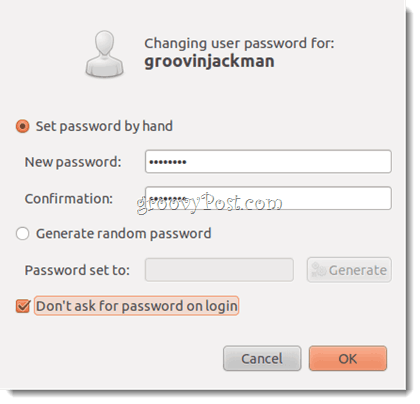
Step 6
Give yourself a good password and Click OK.
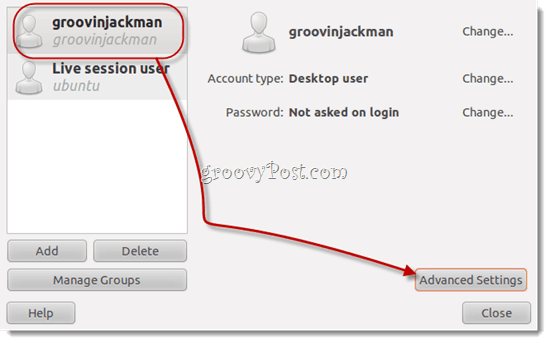
Step 7
Select the user you just created and Click Advanced Settings. This is important. Otherwise, your user won’t be able to install new software or access the Internet.
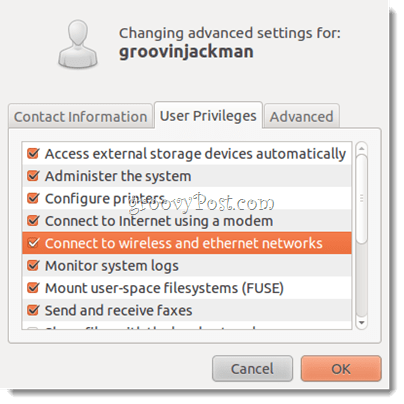
Step 8
Under the User Privileges tab, go ahead and Check everything. Click OK.
Note: If you don’t do this, when you try to install new programs or do other administrator-only tasks, it’ll ask you for a password for “Ubuntu” over and over and fail to authenticate.
Step 9
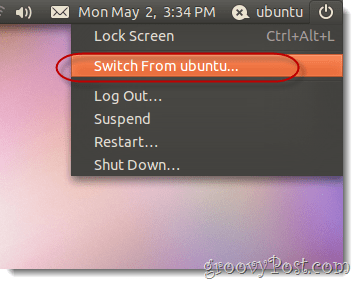
Click the Power Button icon in the top-right and choose Switch from Ubuntu…
FYI “Ubuntu” is the name of your live session user. I know, it’s kind of confusing.
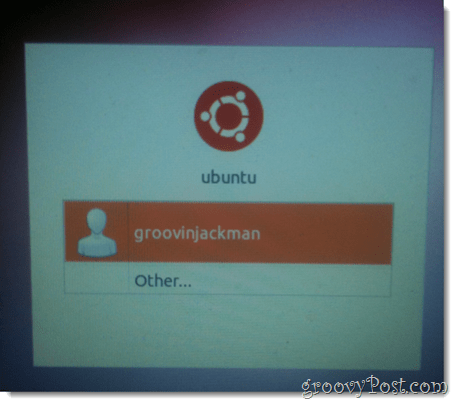
Step 10
Choose the user you just created.
You’ll be logged into a new desktop. Now, you can go about your business, adding programs, changing settings and creating documents and they’ll all be there when you come back. Note: I can’t really explain why some users have to add a new user in order to get an Ubuntu Live USB to stay persistent. The first time I tried it, it didn’t work it all—I made changes to the live session user and when I rebooted, poof, they were gone. I then added a new user and the changes were saved for that user. But then, when I re-did this entire process for the tutorial, I noticed that items I was saving to the desktop for the live user stayed persistent after I added another user. I know this isn’t a very expert sounding piece of advice, but if you encounter any quirks along the process, I recommend trying again from the beginning. That means re-downloading all the ISOs and programs, re-formatting your flash drive, etc. Sometimes things get funny with the download or the install that are unexplainable. The only difference I can think of that may have had an effect on my success is that the second time I attempted a persistent install, I used a small persistent set-aside of 1 GB. The first time, when it didn’t work as well, I had a persistent file size of 2 GB. If you give this tutorial a shot, I’d love to hear how things turned out for you.
Conclusion
I call this method of installing Ubuntu the best of both worlds—with portability! You’re not fudging around with your main system disk, but you also don’t have to virtualize anything, meaning that this solution is 100% suitable for lower-powered machines (like my netbook). But best of all, because the installation is persistent, I can pop out my SD card, slip it into my pocket and then load it up on another computer and boot it from there with all of my stuff already there. This is actually what savvy tech support crews and data recovery specialists do. They just load up their toolkit and operating system onto a thumb drive and fire it up on the client’s machine, even if it’s not bootable due to a virus attack, hard drive failure, etc. I’m sure you can think of plenty of other groovy uses for a complete portable OS, though. Now go out and enjoy Ubuntu—or whichever Linux distro you chose! Tux logo used in featured image by Larry Ewing. Very helpfull and fullfiled in details. I’ve been struggling with Live Session for several months, but you explained all with accuracy. Thank you! I’ve been using the “Universal USB Installer” for a long time and it’s great to test Linux distros from my dear 4GB USB drive. However I have a doubt for the persistent option: how big can I do it?I make this question as I think it has to be as big as we can, but we have to let room for the distro files to be inside the USB drive. The ISO size for any distro is like a 4GB DVD but I’m sure usually it’s not that big. So, how big can be the persistent file anyway? Is there any way to have a clue of what to choose before installation? Thanks! “A PC with a BIOS that supports booting from USB. (Note: This does not include Macs. Sorry.)” Comment Name * Email *
Δ Save my name and email and send me emails as new comments are made to this post.


![]()
